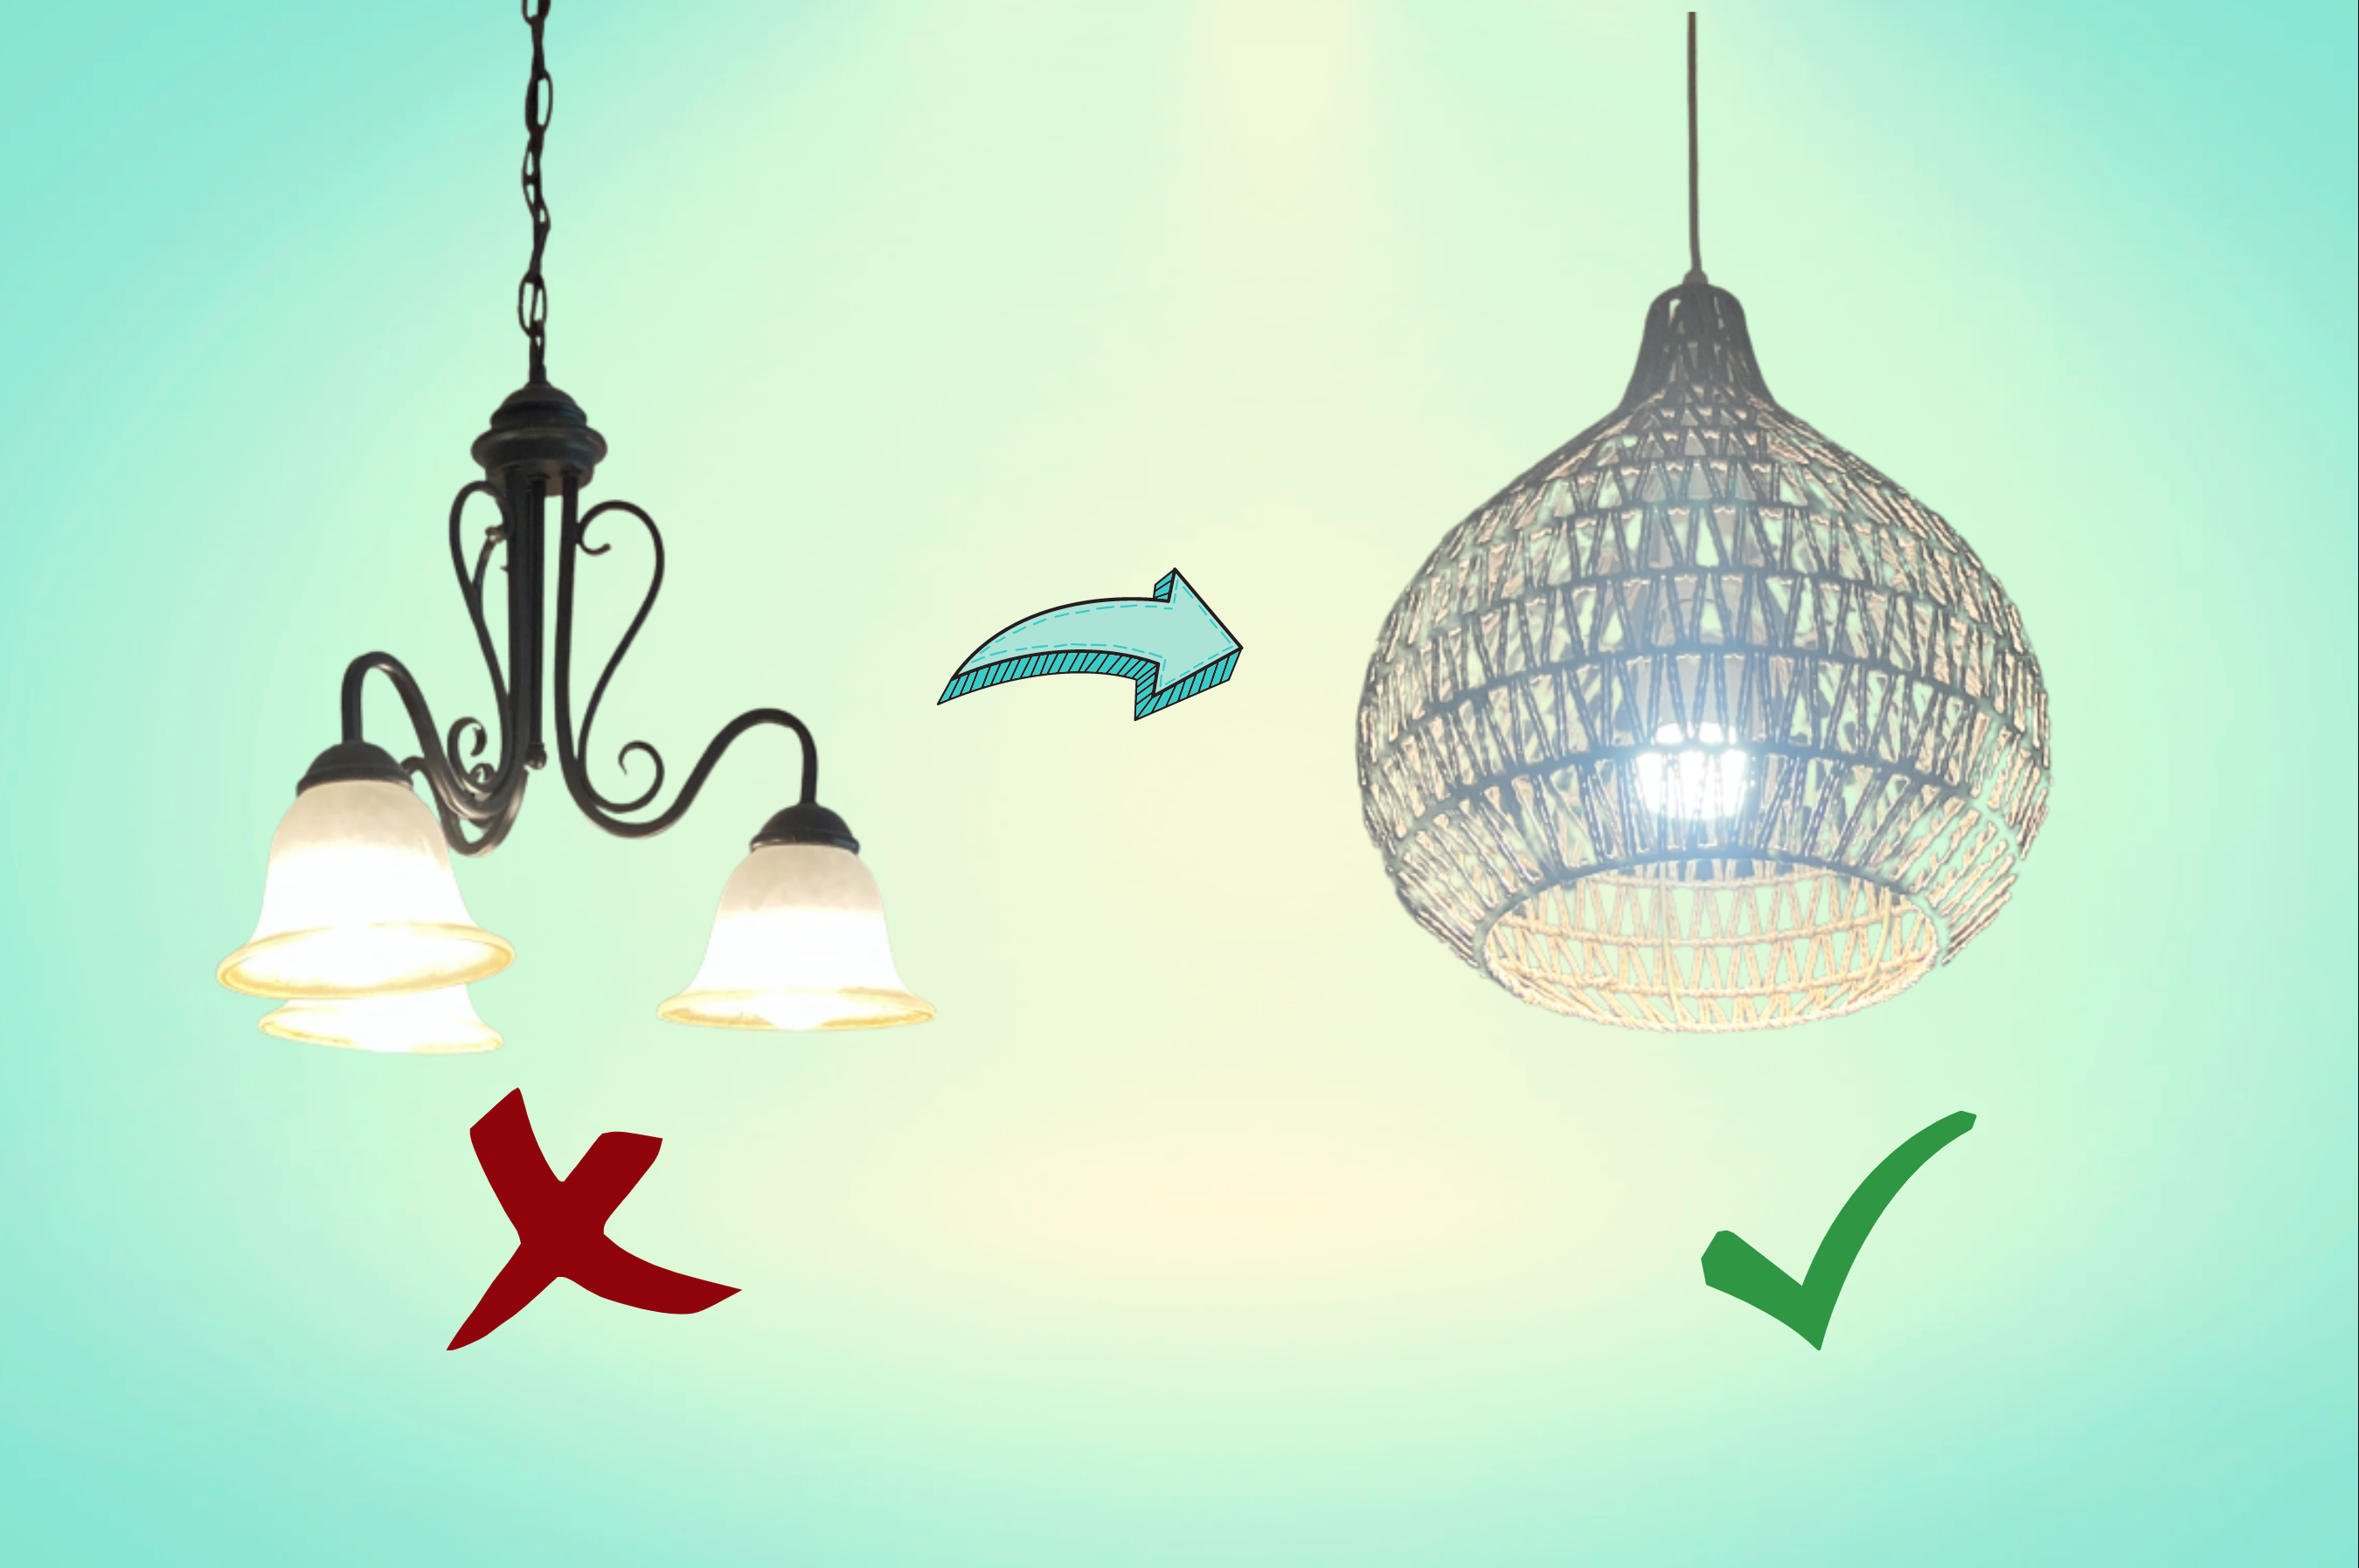
How to replace an ugly chandelier with a trendy ceiling light
For some reason, I always thought there was no way I was capable of replacing a hard-wired light fixture. There was something about the wiring aspect that scared me off from attempting it, until recently. I decided I was going to attempt to get rid of the old ugly chandelier in my dining room and put in something more modern. It turned out to be easier than I thought it would, and most of all I’m extremely happy with the results!
If you’re trying to make a room look put together and intentional, there is only so much you can do without changing the lighting. Furniture, paint, rugs, and everything else won’t mask a big old ugly light dangling from your ceiling. In newer houses this is even easier, but in my old house it was a bit… interesting.
I suggest having a friend help out towards the end; there are a couple of parts where an extra set of hands makes things much easier.
Warning:
- Don’t do this without turning off your electricity! There is a potential to get electrocuted, however, turning off the electricity will mitigate this risk.
- In some states, this type of electrical work is only allowed to be done by an electrician.
Tools needed:
- Philips screwdriver
- Strong scissors
- Wire cutter/stripper (I did not have these and made do with scissors and a utility knife)
- A step ladder or sturdy chair that’s high enough to reach the ceiling
If you’re still unsure if you are up to trying this, skim this whole page to get to the trickier parts to see if this looks like something you would be willing to try.
Here is how I recommend going about it:
Step 1: Find a light and verify it will fit
My dining room has lots of natural wood color to it, and I thought that a rattan-like twine shade such as this one would bring the room together. I ended up choosing this light from Globe electric:
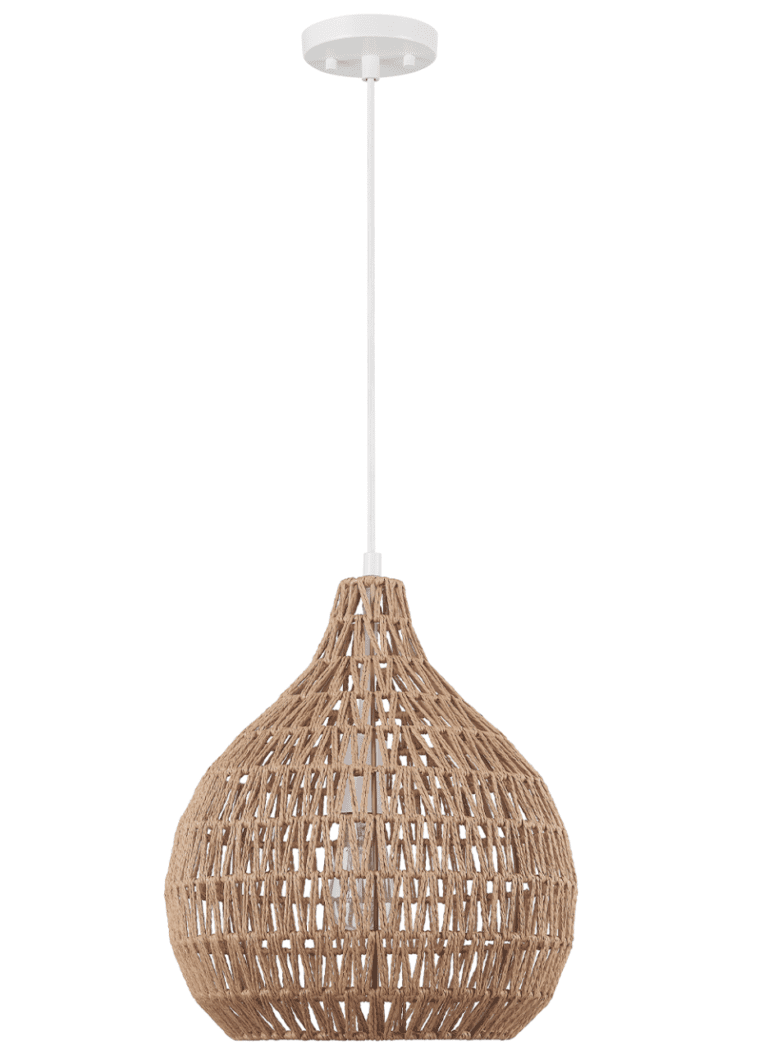
They have lots of other well-priced lights as well that would have worked for this installation. This one was $139.99, but it’s available in a different color for $89.99 here.
The old light fixture held three bulbs and this new one only holds a single bulb, but honestly the old light was too bright anyway (one high-quality smart bulb did the trick in the end). It also looked like it had a similar-sized ceiling mount, which is super important.
One big problem you can run into with this type of project is if the hole in the ceiling is too large underneath the light canopy (the base of the light that the wire runs through that’s mounted to the ceiling). Some ugly lights use really large canopies, and in rentals especially, landlords seem to love making the hole in the ceiling with a hammer. I measured the existing canopy and compared it to the new one and found it to be 4.75”, an almost exact match. This how-to assumes you have a hole that is about the right size. If it is gigantic and nothing seems to work, you can consider attaching a medallion such as this to your ceiling beforehand to close the gap.
Step 2: Turn off your electricity!!!
Some say that you want to turn off the light switch and more importantly, switch the breaker off for the circuit the light is on. I ended up switching the main breaker for the whole house as I didn’t trust the labeling on my breaker, or the wiring for that matter. When I finally saw wiring in the ceiling I saw some other extra wires that I wasn’t sure what they were for, so I was glad I killed the electricity to the whole house.
Step 3: Remove the old light
It is potentially worth doing this BEFORE you buy your new light, but will add extra reassembly steps if you do that. The reason why it’s worth it is just in case you take apart the light and it’s an incoherent mess that you’re not sure you can work with. If you have a complete “oh shit” moment, you can put the light back together before you disconnect any wires. However, mine was a total mess and worse than anything I’ve seen online, but I got mine to work.

Some canopies have screws you can take off, while in others the entire canopy unscrews. Mine was the latter; I simply loosened a nut ring and then unscrewed the entire canopy. What was underneath was a complete mess and looked like this:
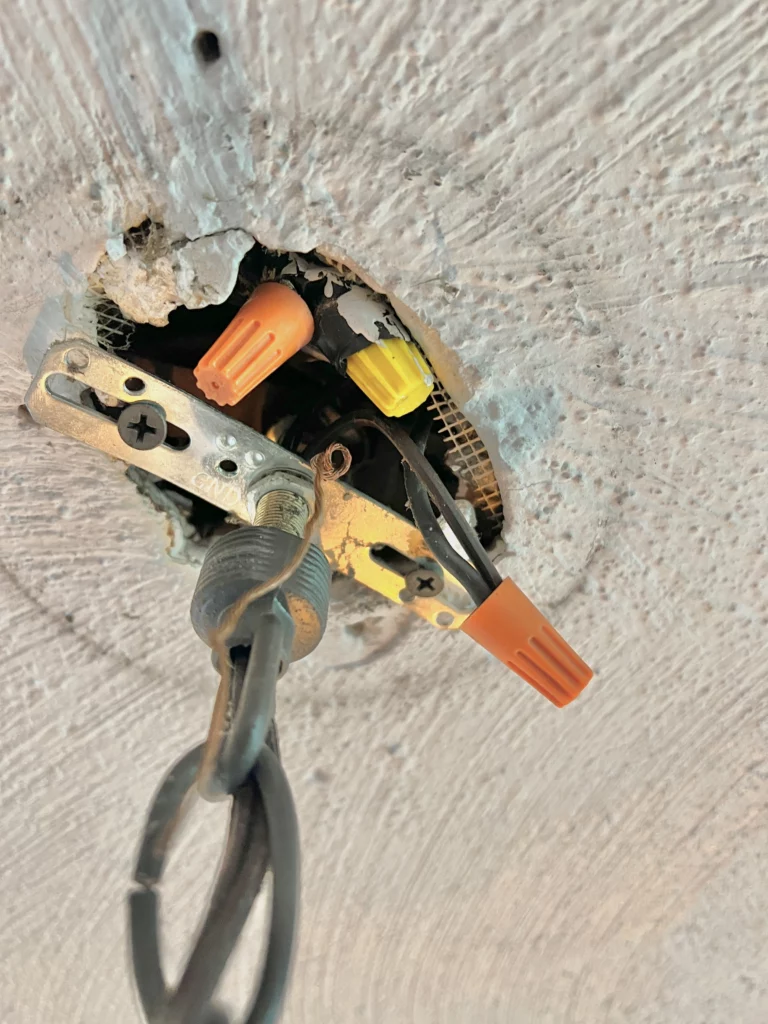
Hmm okay… not what I expected. I followed the wires from the light to the twist-on wire connectors; these need to be untwisted to be disconnected. It’s worth taking a moment to consider and remember (take a photo) what is connected to what. It’s also a good time to figure out what wires on your light will go where in your ceiling. There is a very good chance that if you do this it will look better in the ceiling than mine did!
Your light will have the following wires:
- Positive black wire
- Neutral white wire
- Grounding green wire
- Bare copper wire for alternative grounding to a green screw on mount
In my case the wiring inside the house wasn’t easy to identify, so another good reason to note which was connected to what before you disconnect. I could see that one of the wires was connected to a wire in the ceiling with a black casing, which means positive. The other wire was connected to a white wire, which means it was neutral. There was no green wire, instead it used the copper wire which was grounded in a more difficult than needed way. There was a third unused twist-on cap in the ceiling that I left alone.
Now I was ready to disconnect the old light, and then the feed wire out and through the mount. The whole thing is on a threaded rod that wire runs through; you can unscrew this and then pull it out fully. Either store or discard the old light.
FYI here is what it is supposed to look like inside your ceiling:

Optional Step 4: Clean up the ceiling area
The area around the old canopy left a ring of dust and dirt that was quite unsightly. There were also some holes in the ceiling from what looked like an even older light installation. I took a minute and filled those holes with some Elmers carpenters wood filler. This stuff is amazing for filling screw holes in walls or ceilings that are white or off-white!
Step 5: Cut the cord on the light to the desired length
Since I wasn’t totally sure what I was doing, I decided to wire up the light with the full length of wire first to make sure it worked. Ultimately you’re going to want to shorten the wire so that the light hangs at the length you want it. If you’re wiring in the ceiling is straightforward I suggest cutting the wire to the right length to save time.
You’re going to want to hold the light by the wire and figure out the appropriate length of wire that looks good in your space. Consider if people would hit their heads on it if it’s not above a table. If it’s above a table, you can have it a bit lower. Remember, you can take away more wire later but adding wire back is much harder! Have someone stand at a distance to get the approximate length you want. Ok, now add about 4-5 inches of wire beyond that and mark it there for cutting (You need the extra wire for what goes into the ceiling and for the spliced parts. Add more if you aren’t feeling confident in your cutting and stripping abilities).
Now is the time to cut the wire with whatever tool you have on the point that you marked. See the exposed wire on the old cord you cut? You need to recreate those on the cord attached to your light so that you can wire it to the ceiling. This is where wire strippers make your life much easier. For me, I just used scissors very gently to cut through the outer wire casing and the plastic wire wrap. If you aren’t careful you’ll easily cut through the whole cord and lose that length. I made a tiny cut with the scissors and then rotated the scissors around the diameter of the cord. Then I loosened and pulled with my fingers to slide it off, revealing the inner wires. To expose the copper inside of these, I very carefully used a utility knife, cutting gently into the wire and an angle almost parallel with the wire away and away from me. I had to use my teeth to pull the wire casing off a couple of times. Honestly, this is a pretty dumb way to do it but I made it work.
Step 6: Remove the old bracket and install the new one
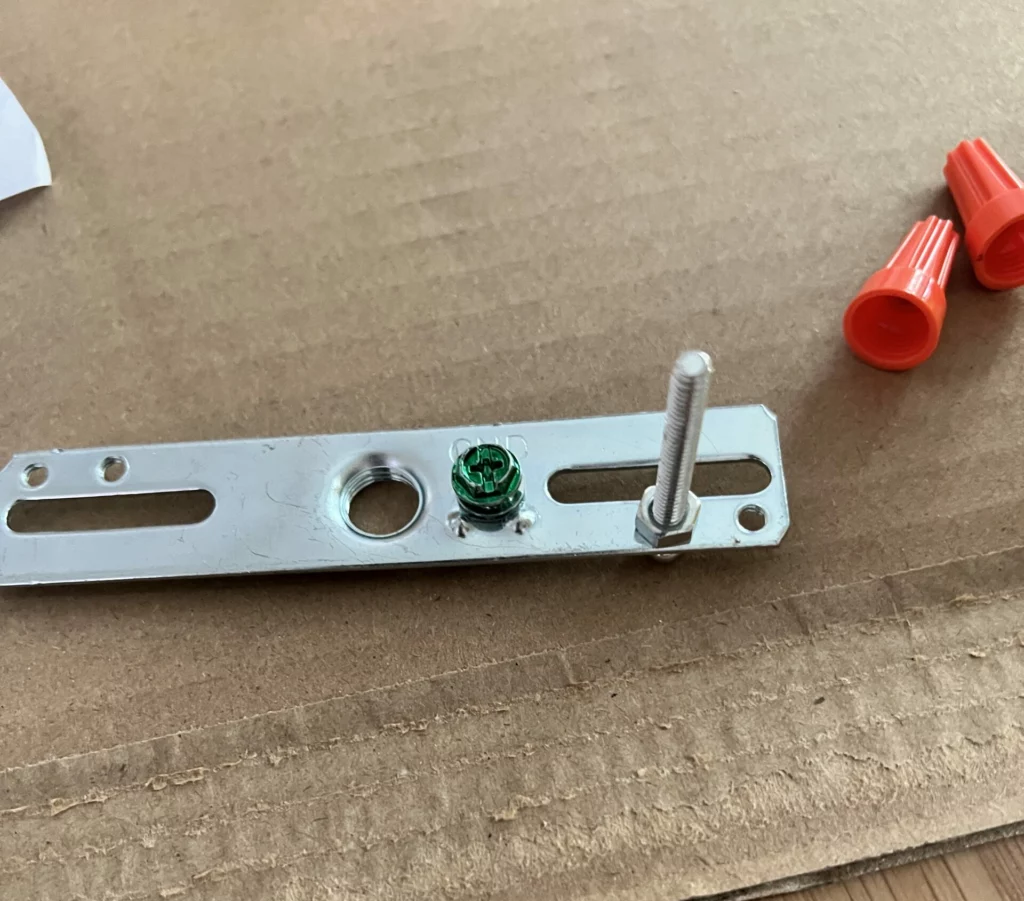
I was hoping that I would be able to just use the old one, but unfortunately I did not have the clearance to get the mounting screws into the existing plates since I needed top access. It was easy enough to just unscrew the old one though. Get the new mount ready, with the bolts installed and sticking out so that you can mount the canopy when finished. Then attach it to the ceiling exactly the way the old one was.
Step 7: Getting light ready for mounting to the ceiling
Put the canopy onto the cord attached to the light, being careful not to snag the exposed wire inside of it.
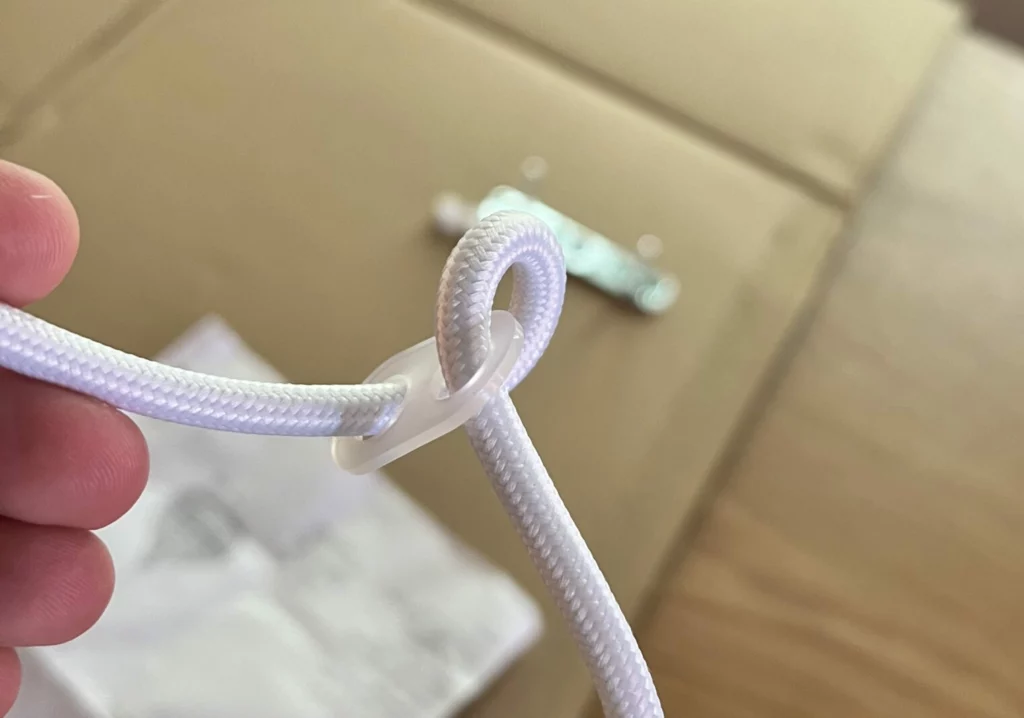
Above the canopy, you’ll want the plastic clip with two holes in it on the wire. Snake the cord through one hole, around it, and through the other hole. This prevents the cord from putting pressure on the points where the wires will be joined in the ceiling.
Before we do the wiring, let’s review how to do it! Skip to step 8 if you’re already familiar with this.
If both wires are strands, you connect them like this:
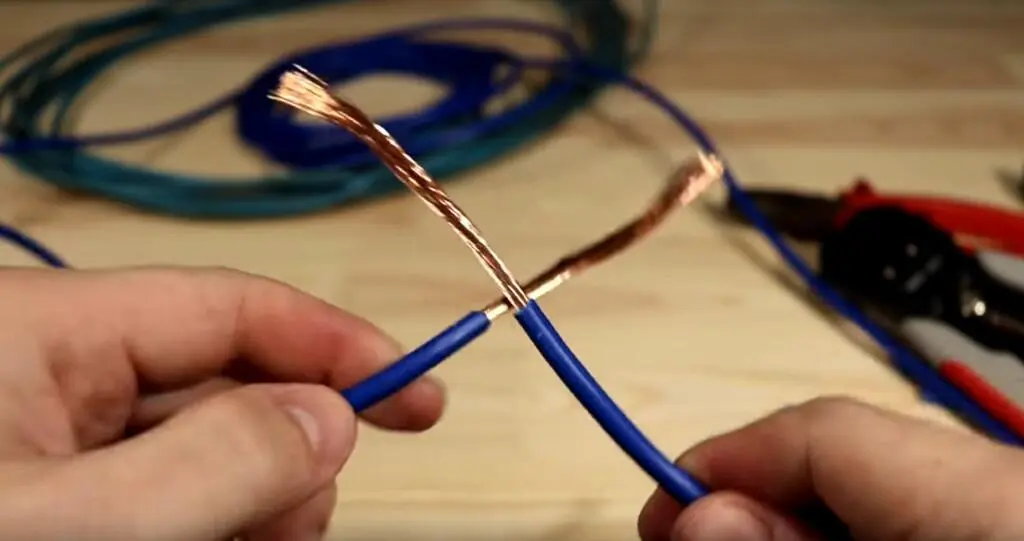
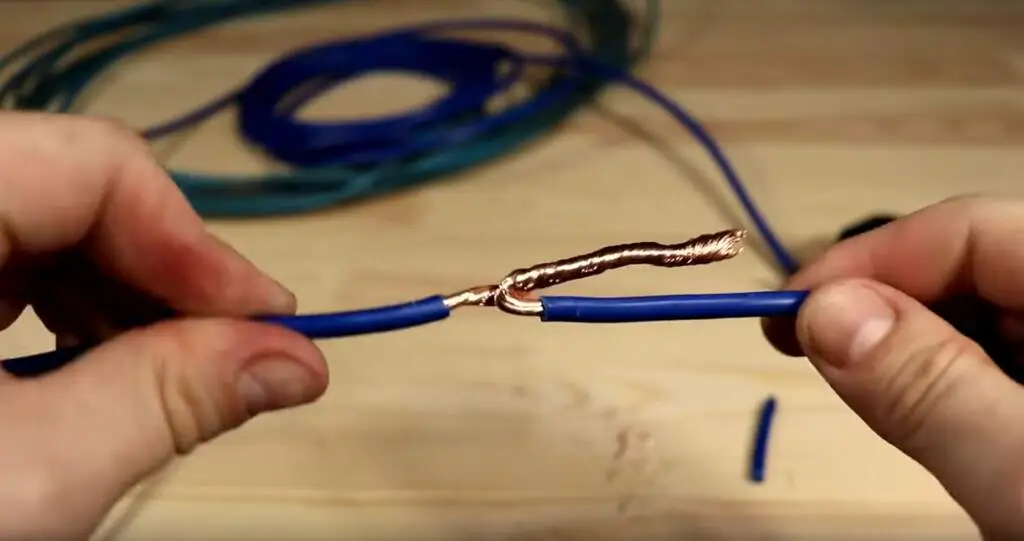
You would finish by twisting the caps onto them afterwards. Of course, you will be doing this overhead to a wire in the ceiling so it will be a little trickier than the images above.
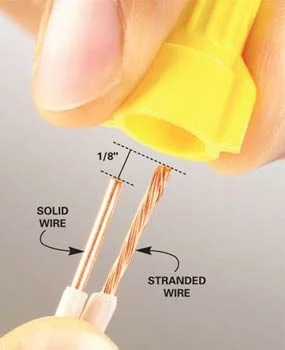
If the ceiling wire is solid metal it’s a little different. You want the wires ends next to each other with the stranded wire sticking out just a little further! Then put the cap over the two and twist it to the right, joining them together.
Step 8: Mounting the light
You’ll want a second person for the next part. Have them situated so they can hold the light up, taking the weight off so that you can attach the wires. Carefully push the cord/wires through the hole in the center of the bracket in the ceiling. Now grab those wires from above the bracket and pull them towards the house wiring.
Remember what the wiring to the ceiling looked like when you took apart the old one? Hopefully you took a photo, or the wiring is very clear. Black to black, white to white, green to green. Use the included twist-on wire connectors to join them together. The house wire will likely be solid metal, whereas the wire from the light will be many strands. You want the wire ends next to each other with the stranded wire sticking out just a little further! Then put the cap over the two and twist it to the right, joining them together. Do this for all wires. Give a light tug on each of them to ensure they are well connected.
Note: If there is no grounding wire in the ceiling, use the bare copper wire from the light and in the ceiling and wrap this under the green screw on the bracket. Then tighten it; this will ground it for you.
Now you just need to attach the canopy to the ceiling! Push it over the two threaded ends of the bolts and attach it with the two white thumbscrews. Your light should be hanging and look pretty good right now.
Step 9: Turn on electricity and test out
Turn the electricity back on by switching the main back. You should be able to turn on the light now with the light switch. Make sure a new bulb is installed of course! If it works, you’re done.
If it doesn’t work, check the obvious things. Did you turn off the main breaker and the circuit? Is the switch off? Is the lightbulb all the way in? If it isn’t any of these, it could be that one of your wires came loose when you re-assembled everything. You can take it apart pretty quickly to see if a wire came undone. I can’t think of anything else that would make this not work at this point, except for a faulty unit but that is very unlikely.
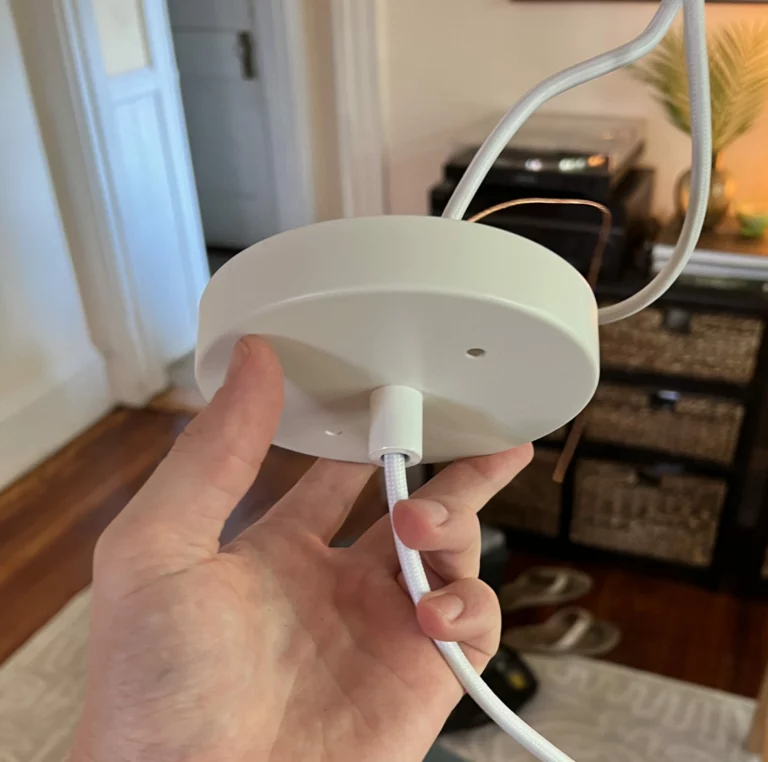
Here is how it came out:
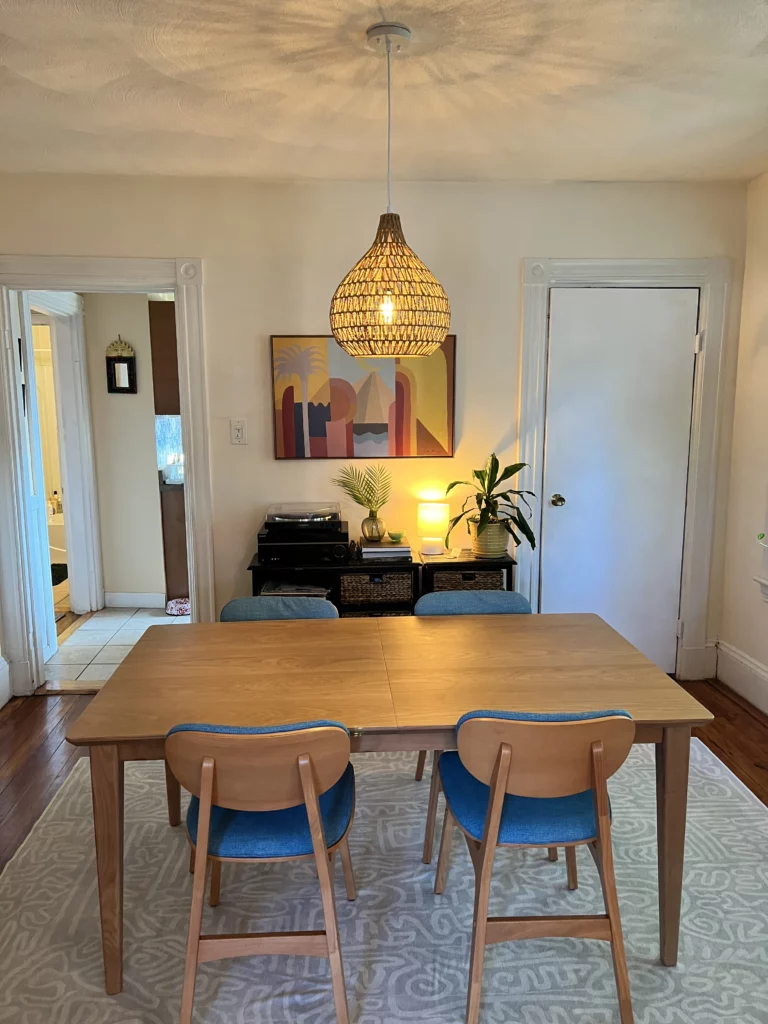
Wrap-up
This process involved a little more than something like plugging in a regular lamp and turning it on. But the overall effect that you get from getting rid of an unsightly overhead light fixture cannot be overstated! I thought that these types of lights were hundreds of dollars, but for only about $100 this was absolutely worth it. I’m actually looking forward to trying this out on some of the other types of lights in my place!