Hack your Ikea Soderhamn with cheap new wooden legs
If you buy something through our posts, we may get a small share of the sale. Click here for more information.
The Ikea Soderhamn is a relatively affordable sectional these days; you can get a big 4-person sectional like this one for $1,099. The only issue I have with the Soderhamn is that the legs on it look a bit too skinny and dated, but luckily you can “hack” your Soderhamn with some new legs that are super cheap.

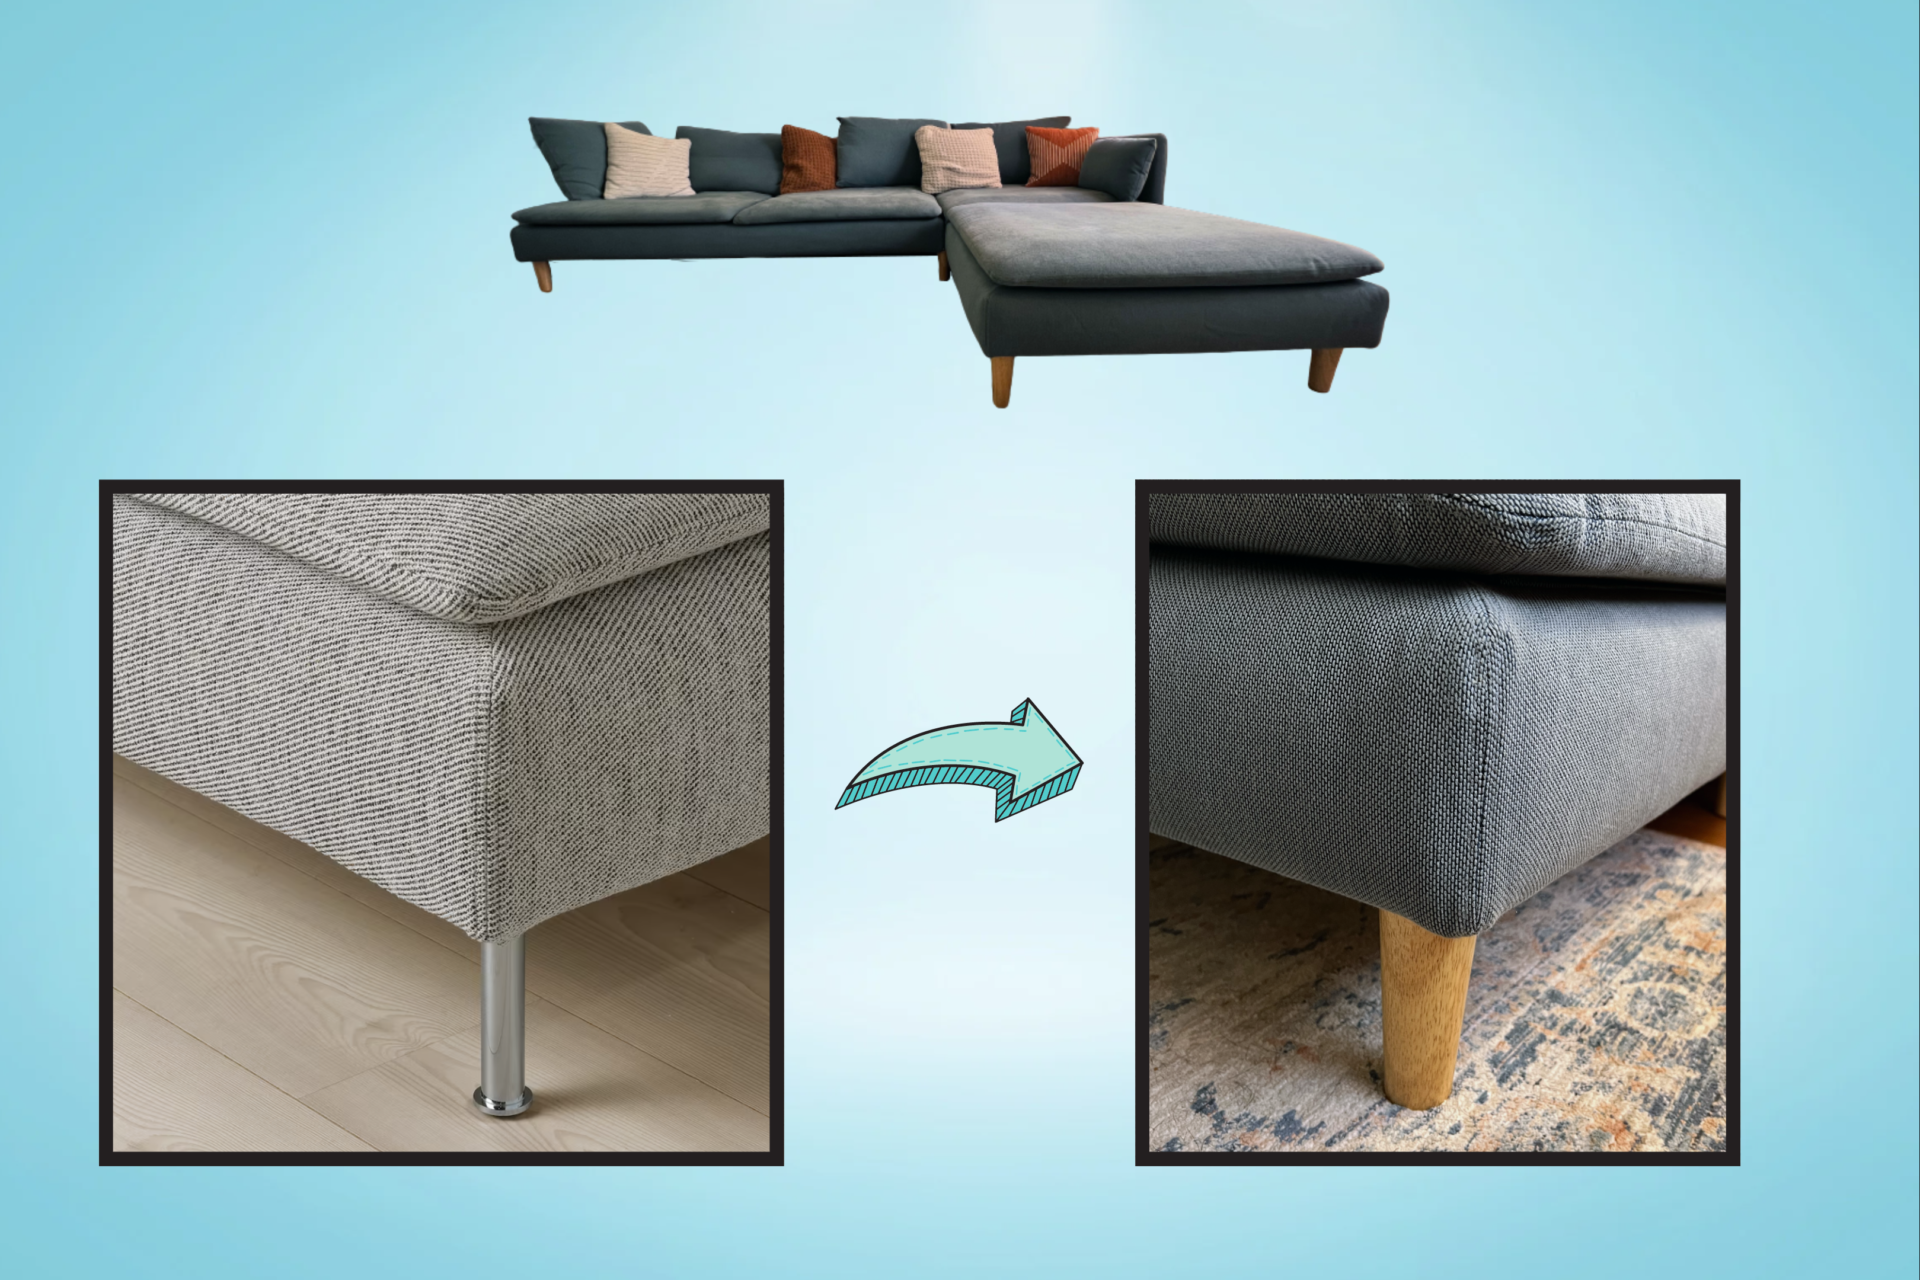
Here is what it looks like with the stock metal legs
Ok, it’s not really a hack, you just buy some legs and put them on the same way you would the regular ones! But doing this is a great way to upgrade the look of your sectional, and there are many more options than just the ones that I’m going to recommend.
Here’s what I got:
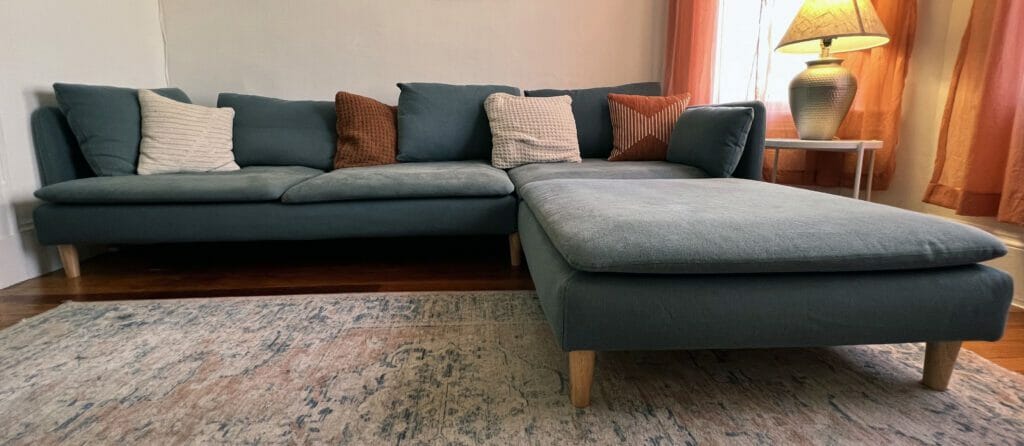
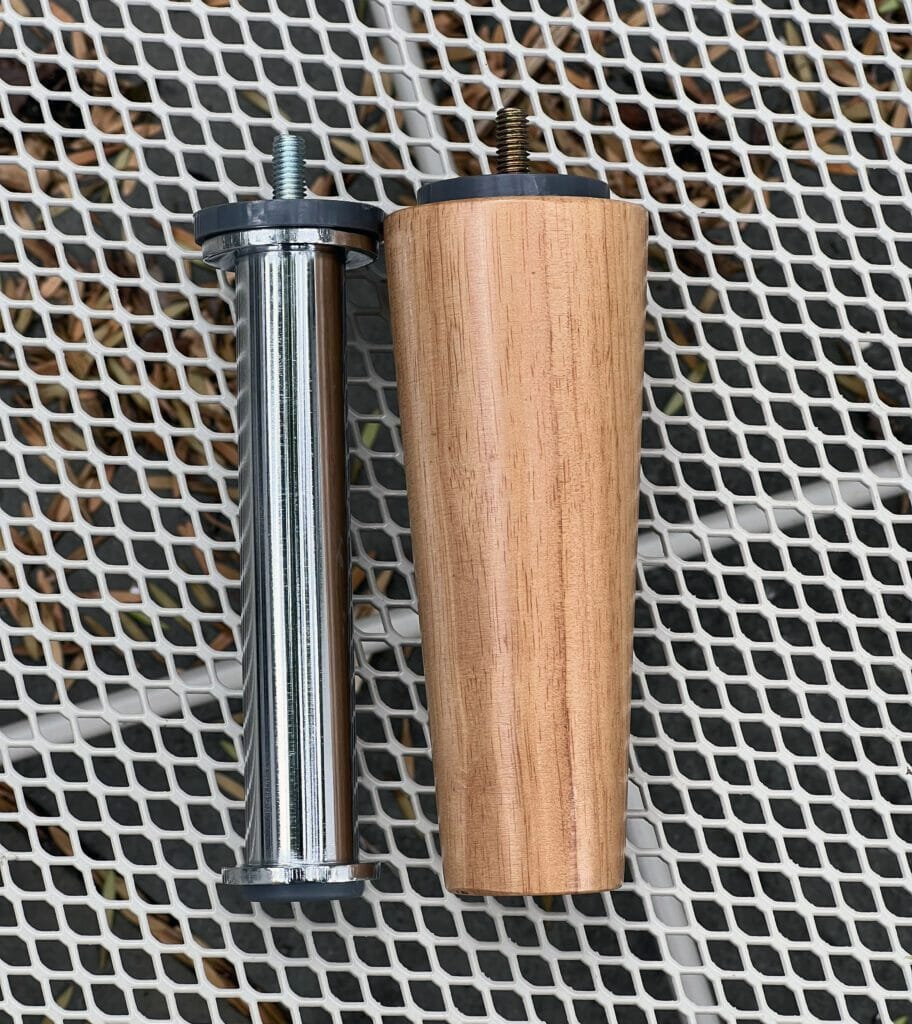
Since my Soderhamn is green, I thought some light wood legs would match better with it. I also don’t like the way the default metal legs on the Soderhamn are completely straight, so I decided to get a tapered look. There are some other brands such as Bemz that have lots of cool colors and options, but I didn’t go with them since their wooden option was $15 each. Ultimately I ended up getting these for much less:
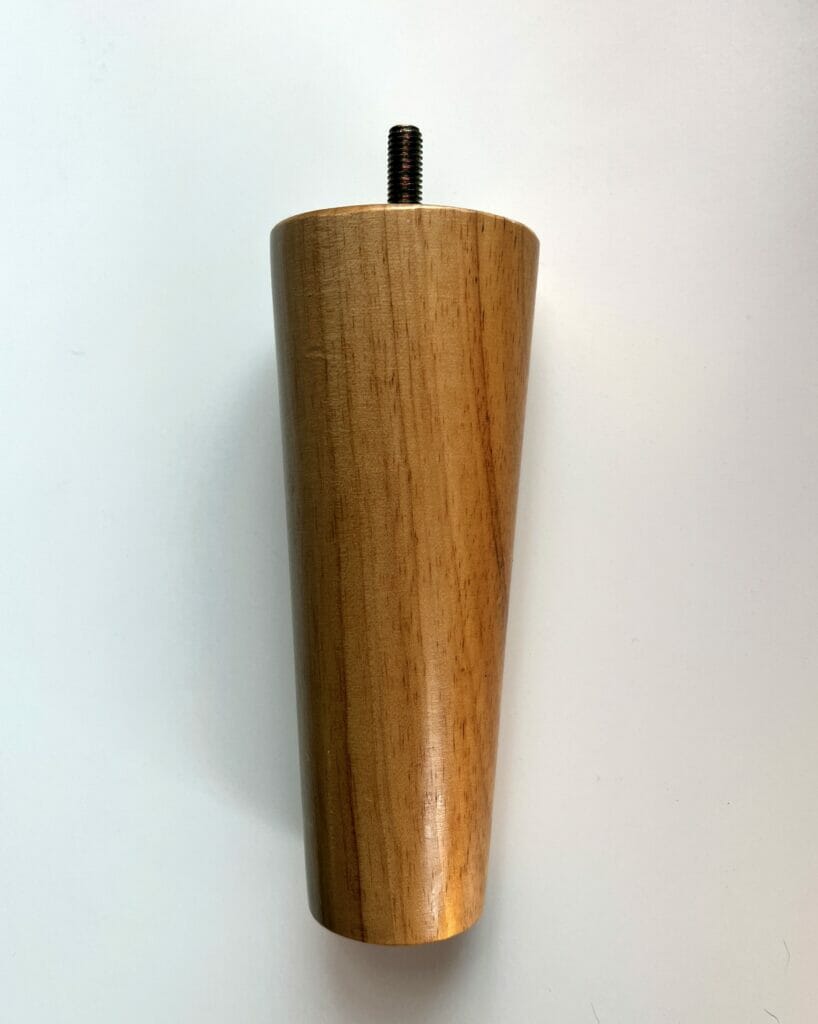
The photo is actually one of mine since the photos on Amazon are actually not what the legs ended up looking like! Strangely, they look better in person.
What made me decide to get these besides their aesthetics is that reviewers said that it worked on Ikea furniture. While Ikea uses M8 threaded inserts to attach their legs to sectionals, these had conflicting information saying that these are both M8 and 5/16″, which are not the same! However, I can vouch that they do work on the Ikea Soderhamn.
There are multiple options for lengths, but I went with 6″ since it is the closest to the stock Ikea legs. If you wanted it to be a little taller or shorter this product is also available in 4″, 8″, 10″, and 12″.
Here’s how they compare to the original:
Here’s what to do:
This is super simple, as when you put together the Soderhamn one of the first steps is just screwing in the legs. Per their instructions:
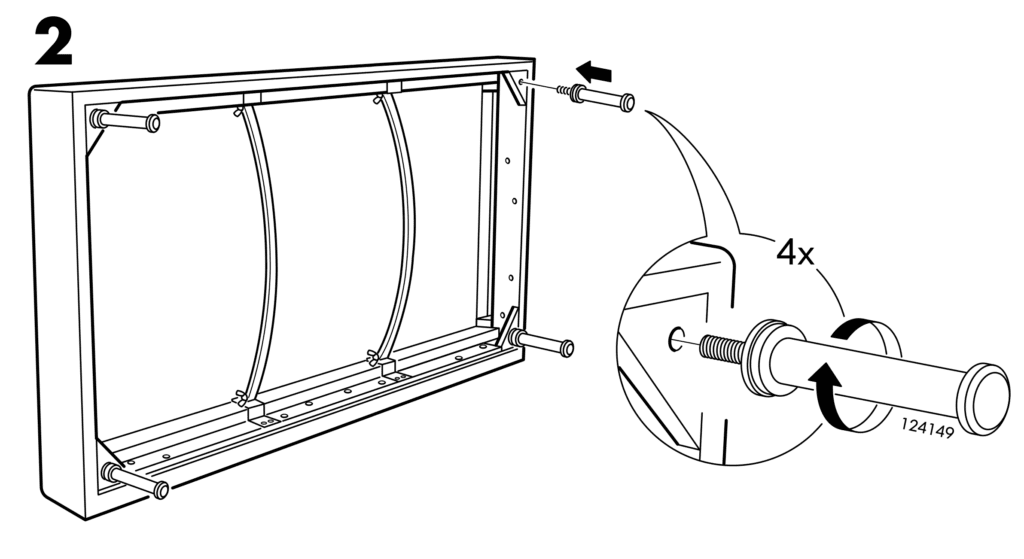
Before you do this you’ll want to use the large plastic washer from the metal legs and put it onto the wooden ones. This helps seat it correctly to the frame. Then do the exact same as the above diagram except using the wooden legs.

If joining sections together:
If you are joining multiple sectionals together, you want where the sections that meet to share a leg. This makes it so that you don’t have multiple legs next to each other, and will also reduce the number of legs that you need.
Let’s look at Ikea’s instructions for this:
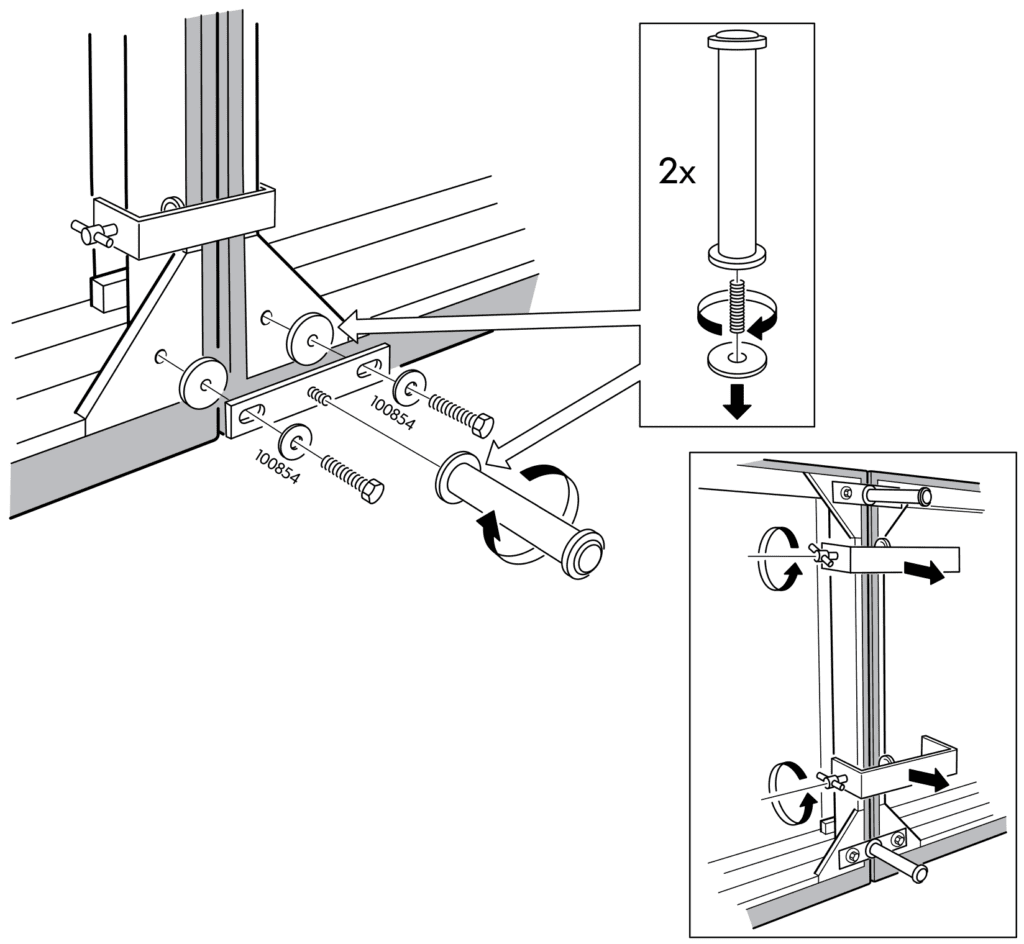
What this is showing is that there are two clamps that join the sectionals in the middle, as well as leg joining brackets that go on the edges next to where the legs go. The leg brackets have their own threaded insert that goes into the Ikea metal leg, which is what makes this a little complicated.
What you do when doing this with the Ikea leg is remove the metal insert from the leg. When doing this you sometimes need to use pliers to loosen the insert. However, with the wooden legs the threaded rod is different. The end that sticks out is made for metal, while the side in the wooden leg is made for wood (these are called hanger bolts). This means that the thread profile is a bit different.
The right way
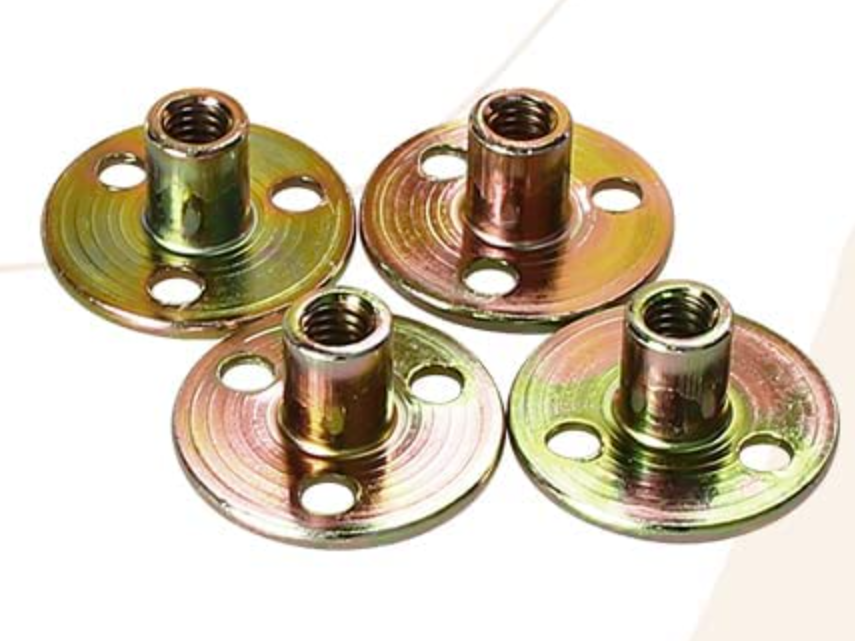
The correct way to remedy this would be to use the mounting plates. Normally you would put the mounting plate on the furniture if there was nowhere to screw in the legs. Here, you would put the mounting plate so that the threads go into the leg! Then you could put the threads from the leg bracket into that.
I have not tried this, but to do this you would have to bore out the hole in the leg to make it larger. These mounts require a 1/2″ hole, so I would just use my 1/2″ spade bit and drill, center it over the existing hole after removing the hanger bolt, and then drill in deep enough to insert the mount. Then use the screws that came with it to firmly attach them to the leg.
The way I did it
What I did which is the incorrect way was to just thread the wooden leg right onto the leg bracket. This is kind of a stupid way to do it since the threads on the part from the bracket are meant for metal and the leg is wood, but it actually fits in there well! I’m sure if I tried to use re-use the leg for something else the inside would be all messed up, but so far it’s been fine.

Wrap-up
I ended up needing to get a two-pack of these, so I spend about $46 in total. Just make sure that you get enough for the configuration that you have! It definitely makes the sofa seem a little more modern and expensive, and I’ve gotten some compliments on it too. I like this mod since it’s so cheap and easy and I definitely recommend trying it out.