How to make the Pulse 3D PlayStation headset more comfortable
If you buy something through our posts, we may get a small share of the sale. Click here for more information.
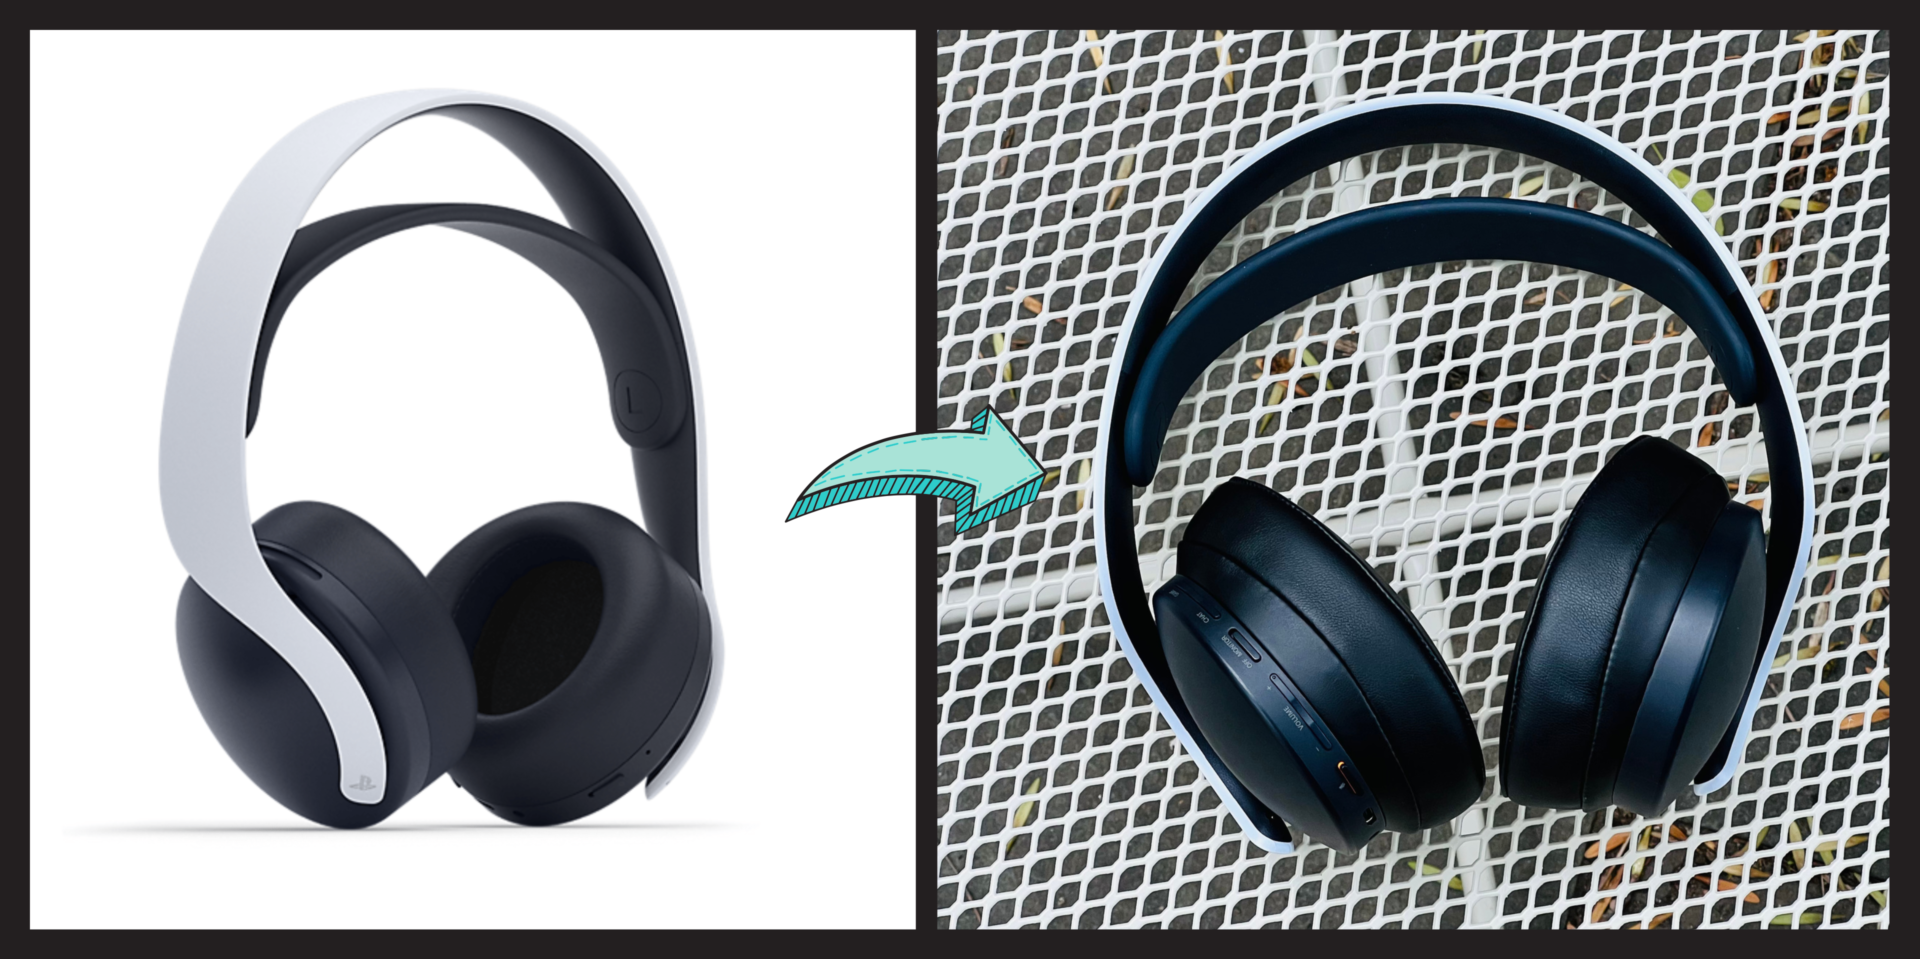
Back in my post about the best PlayStation headsets, I mentioned that Sony’s own headset is one size fits all as there isn’t really any adjustment to make it more comfortable. This is pretty annoying considering how comfortable some of their other headphones are! What this has meant for me and my large head is that the headset has felt really tight, to the point that I would start to get headaches after just minutes of wearing it. I thought I had wasted my money and was really frustrated, but luckily I found out that you can make a simple modification to your headset that makes it way more comfortable by just replacing the earpads.
Note: If you haven’t bought the Pulse 3Ds and are considering them, I highly recommend you also look into the more premium Sony Inzone line. Check out my review and comparison.
How do earpads make it feel less tight?
I wondered the same thing at first. It turns out that what I have mistaken for tightness in headphones is actually the drivers (the actual speakers inside of the headphones) pressing on my ears/head. This has less to do with the tightness of the headset and more to do with how the padding on the earpads spaces the hard plasticky drivers away from your ears. If the earpads are not thick enough the drivers will press on your sensitive ears, basically creating little pressure points instead of distributing the clamping force of the headphones onto your head around your ears.
I will preface this by saying that to do this you have to destroy the earpads that came with the headset since they are glued on. The scariest part is cutting the earpads, and then the time when you are trying to get the new ones on which can take a little patience. But as long as you are careful and don’t rush you shouldn’t have any issues.
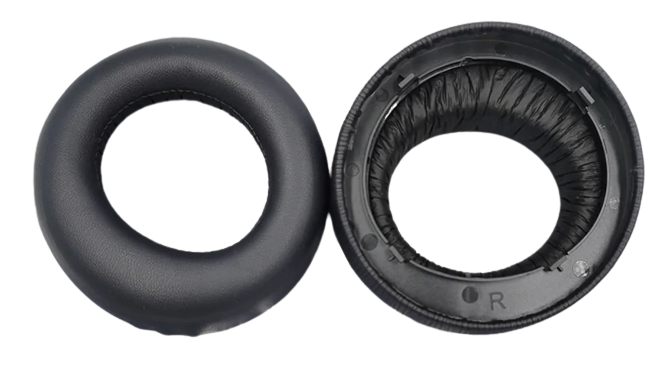
Note: I’ve seen there are some replacement earpads you can buy that streamline this process, where you just pop them on and don’t have to destroy the stock earpads such as these or these. I haven’t tried them, but the reviews seem to say that the replacements have the same issues as the original ones as they are similar in size. The ones I chose add padding and increase the radius of the pads.
How to replace earpads | Difficulty: easy/intermediate
Materials Needed:
- X-acto/precision knife (could probably use a utility knife but I didn’t)
- Safety gloves to protect your hands while cutting
- Pulse 3D headset
- Replacement earpads
- I used the WC PadZ, but any similar sized should work (4.33 x 3.54 x 1.38 inches)
Here’s the gist of what we’re doing: basically the headphones have a large plastic ring for each ear that has the earpads on them. We are simply going to remove the earpad and ring assembly from each ear and then cut the earpads off completely revealing just the rings. Then we put the new earpads on and re-assemble the headphones. The re-assembly can take some patience and trial and error, so don’t panic when they don’t go on immediately.
Note: I got this idea from an Amazon review, but I think I found the Youtube video that inspired the person on Amazon. This Youtuber Matnetik shows how to do this exact project, and has good detail on the cutting part in step 2 below. Definitely recommend! I also did this same mod to a pair of cheap dupe headphones, making them much more comfortable.
Now let’s break it down:
Step 1: Remove earpads/rings from headphones
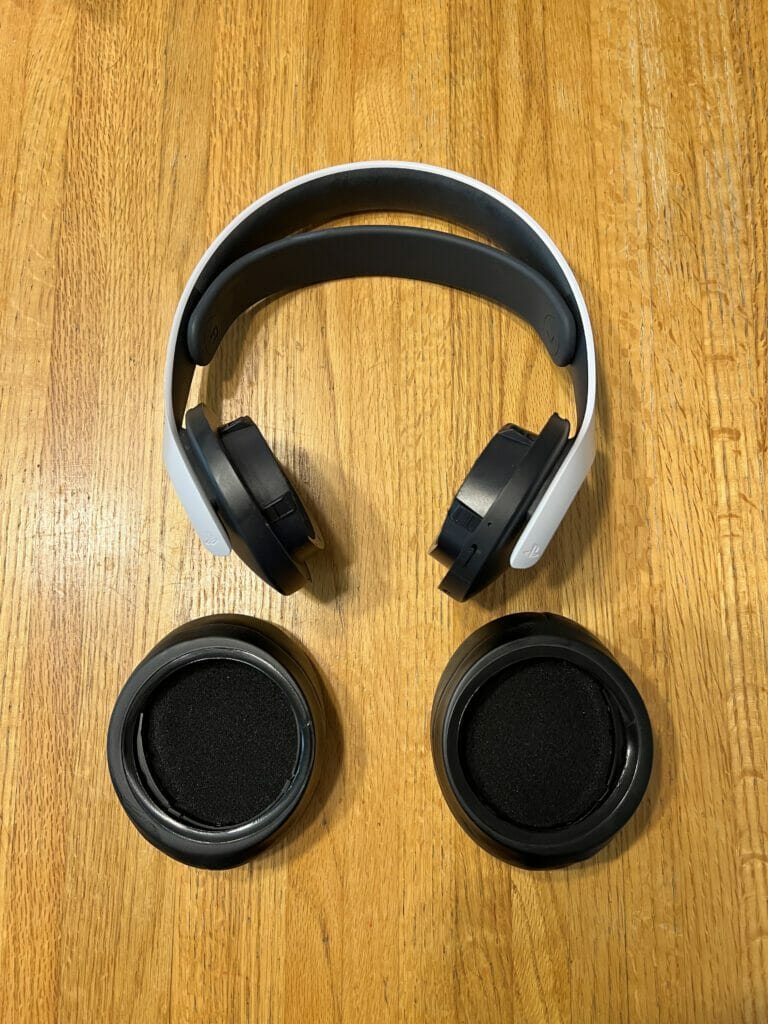
The earpads with the inner ring inside can easily be removed from each size. You can see the seem around where the earpad and ring are attached; simply grab firmly with your hand and squeeze gently while pulling and they will come off. You should feel the ring underneath and be pulling on this. They are attached with small plastic clips, so don’t force them off, they should come off easily.
Step 2: DESTROY (cut off stock earpads)
This is the part that takes a little bit of bravery. Be careful and don’t go too fast! You’re going to cut off the earpads. I forgot to record myself actually doing the cutting, but can explain it here:

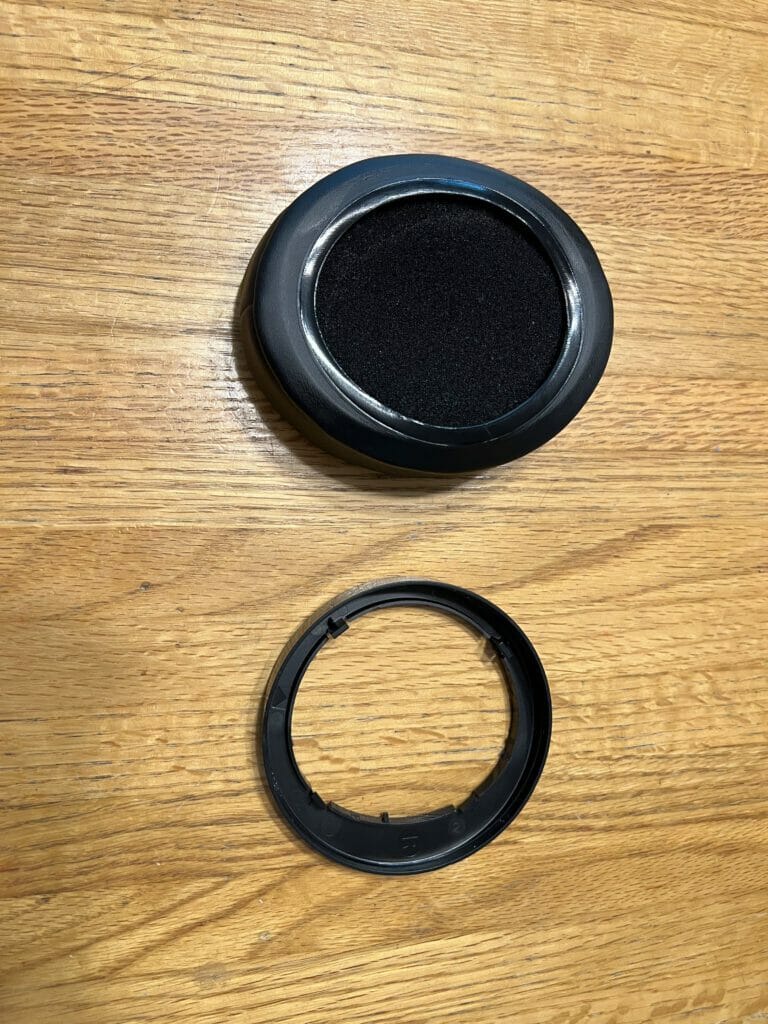
What I did was just cut into the thickest part, making a cut through the leathery material around the entire circumference. I didn’t want to cut too close to the plastic ring yet out of fear of cutting the ring itself or the clips. Once you have a circular cut pull out the inner foam, giving your more room to continue cutting. Then I cut right up close to the plastic rings inner diameter all the way around. Then I made a cut perpendicular, all the way around to where the material ends on the outer diameter. You can carefully peel the leathery material away from the ring and it should come off cleanly. Make sure you don’t leave any pieces behind and you should end up with a ring like this:
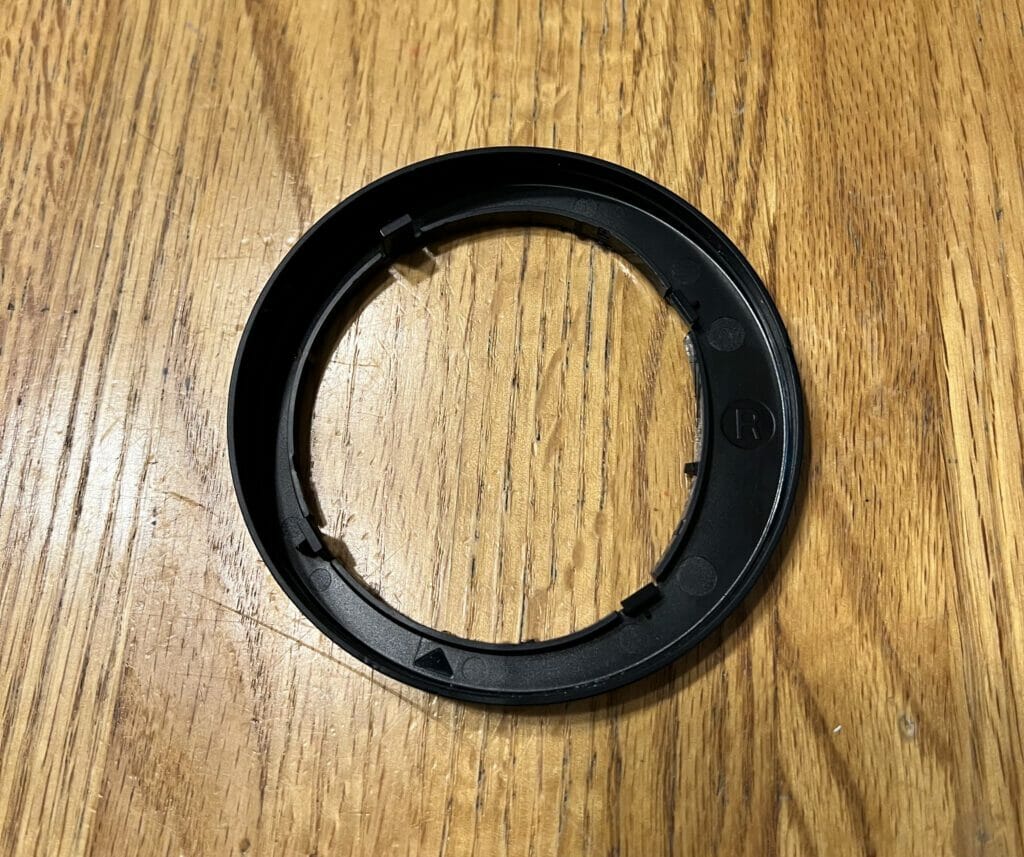
Repeat for the other side and place both rings to the side. Note that they are labeled left and right.
Step 3: Put the plastic rings inside of the new earpads
On the back of the new earpads is a larger opening than the side that would face your ears, with a more flexible rubber material around the opening. We are going to put the ring into this backside opening, with the plastic clips on the ring facing you.
The ring will seem a little big for the opening, but just work it in slowly, stretching the rubber around into it’s in there securely.
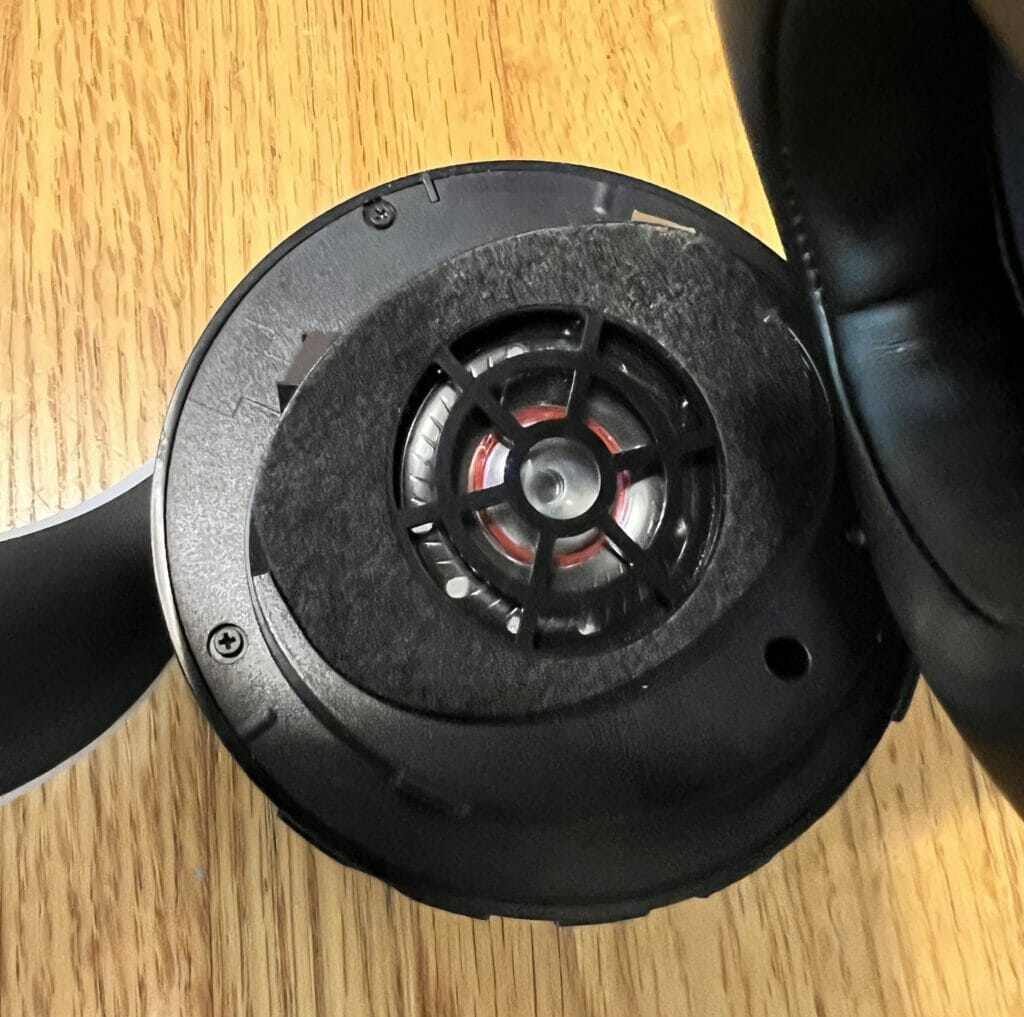
Step 4: Remove mesh from either headset or ear pads
See the mesh material on the ear pads? You may have noticed that the headset has this as well, covering the speakers themselves. The issue here is that if you have both the sound will suffer, so you have to choose one and eliminate the other. I got rid of the ones on the headset, that way I could change the ear pads in the future if they wear out and wouldn’t need to make any further changes.
I simply made an incision in the mesh and then peeled it back all the way to the edge, all the way around. The material underneath got roughed up a little but it didn’t affect the sound at all.
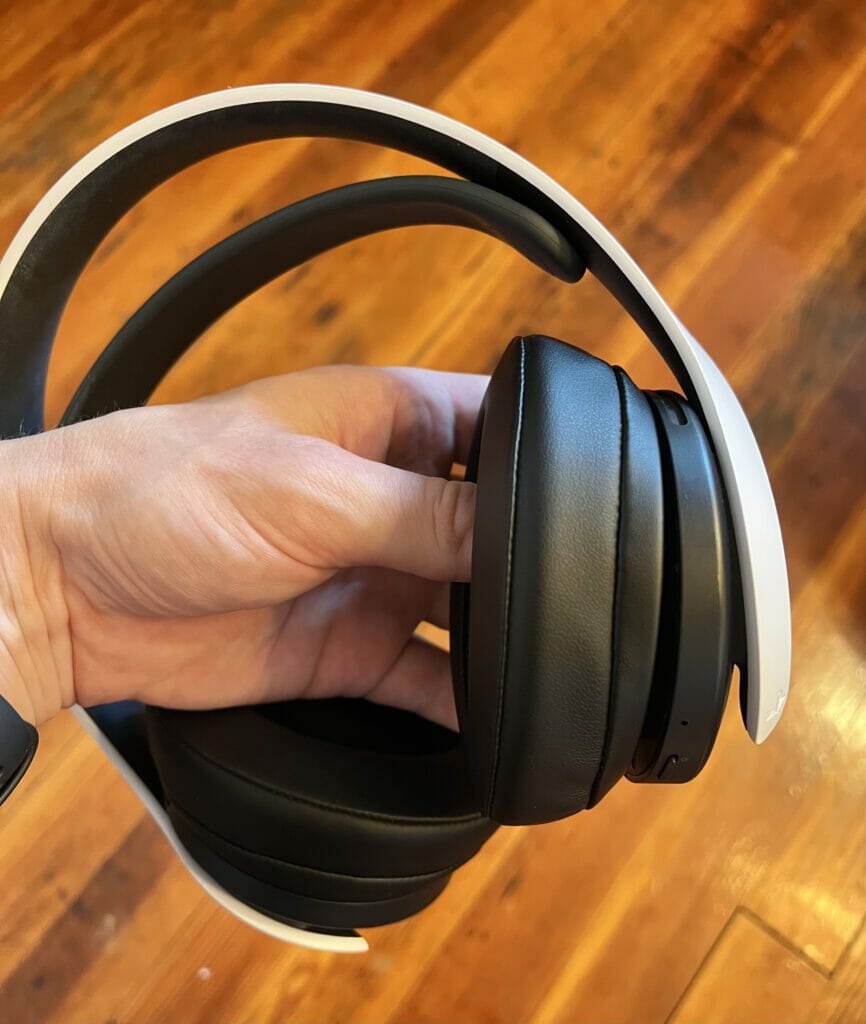
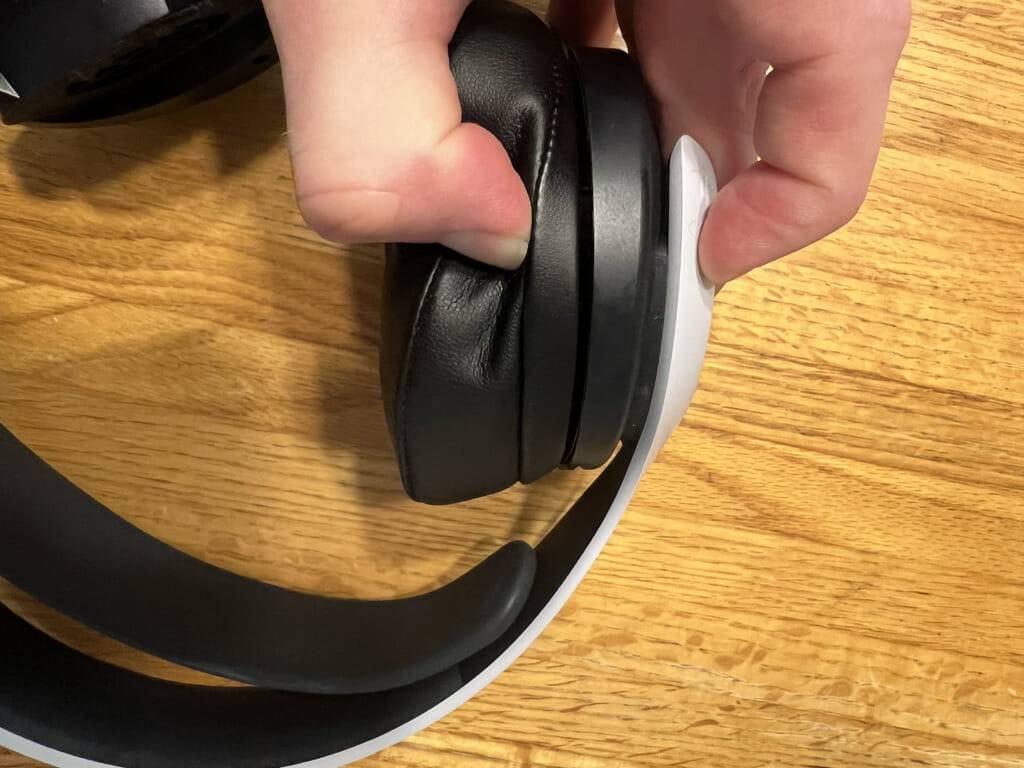
Step 5: Attach the ear pads/rings back onto the headset
So close! This last step can be a little annoying. Since the part of the headset it attaches to is oval that makes it a little easier. Try and line up the earpads with the headset (make sure you have the correct left or right one), and keep finagling it until it lines up. Typically it will suddenly line up and a few of the clips will engage when pressed, with one troublesome one that won’t go (there are four total). In this case, I grab the whole headset by the earcup I’m trying to attach, with thumbs on the underside of the ring and fingers on top of the part I’m trying to attach to (as if you’re about to take a bite of a hamburger). Firmly press, and if this doesn’t work try and pull out a little bit of the leathery material as this may be blocking a clip. Definitely took some trial and error here but wasn’t too bad.
Step 6: Test them out!
I had a panic at this point where I thought I had somehow ruined my headphones. Turns out that I had accidentally hit the button that says “Game” on one end and “Chat” on the other, which changes the volume priority. I had it all the way to Chat which made it have no game volume, so if this happens to you just press the Game button until it comes back.

For me the sound was great and I didn’t lose any volume or bass. This could be a good opportunity for you to mess around with your EQ settings on your PlayStation if you want to tweak your sound profile.
Wrap-up
After doing this mod the comfort is WAY better! I can go for hours no problem now. You can do this modification to many other headphones, and I’ll be trying this with some dupe noise-cancelling headphones to see if I can make them feel more premium.